Data access filter
Each application using MIDATA has its own access rights to the data. After you have registered your application the first thing you should do is define what access rights your application needs.
The user that will use the application needs to agree to this list the first time he uses your application.
Access may be restricted by the following dimensions:
(Semantical) Content-Type
Examples “Body weight”, “Allergy”, “Pseudonymized Patient Record”
The semantical content type of a record is determined by a code inside the record for some FHIR resource types and may be the FHIR resource type itself for other types. An “AllergyIntolerance” FHIR Resource is a semantical content type already whereas an “Observation” is not.
The semantical content type is what the user will understand best.
Groups: Multiple content types may be summarized in a group
Examples: “Fitness data”, “Laboratory Results”
The list of available groups is predefined by the MIDATA administrator.
Resource Type
The FHIR resource type may be used for restriction in addition to the content-type.
Codes
In addition you can restrict to a specific code
Examples: Only body weight with codesystem “http://loinc.org” and code “29463-7”
Your data vs all data
The application may either be granted only access to the data of the user itself or also to data that is shared to the user
From specific app vs any source
The application may either be granted only access to data written by a specific application (like this application itself) or to data written by any application.
Public data vs private data
MIDATA also has a pool of data which is public which means it may be read by anyone having a MIDATA account. Public data is only returned by a query if the access filter explicitely stays that public data shall be included.
Time restrictions
Access may be restricted to data written or updated in a specific period of time. Please note that this is not useful for all kinds of data.
Security Tags
For each content type it may be defined which security tags must be present for read, may be added by the application or are automatically added by the platform.
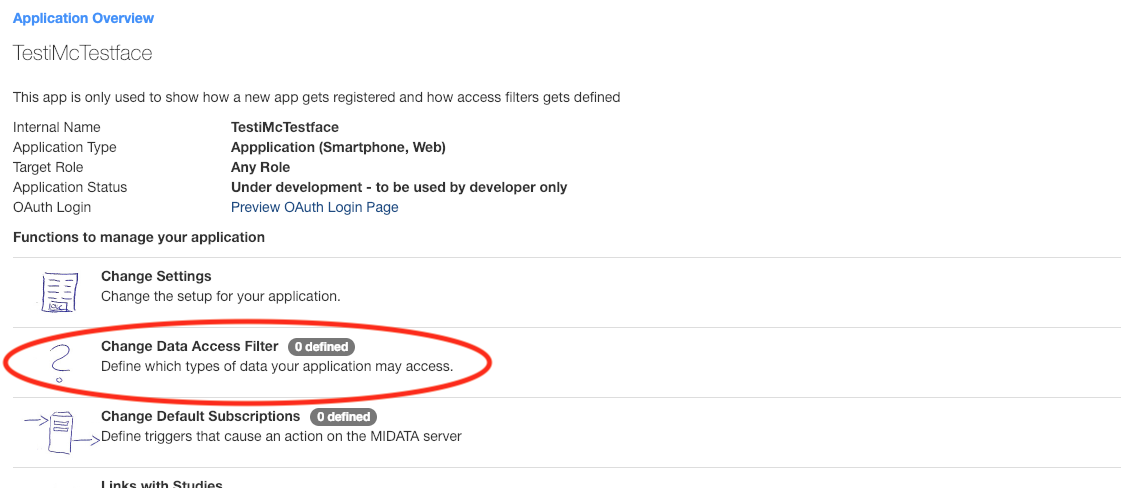
Click on “Change Data Access Filter” on the overview page of your application.
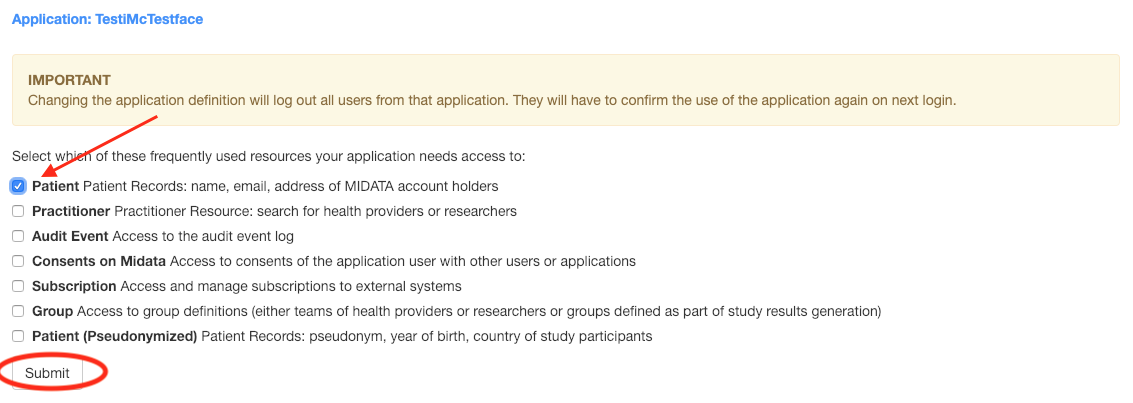
If you have not defined an access filter yet the platform will ask you if you want to include these special resource:
- Patient Records: name, email, address of MIDATA account holders
- Group Access to group definitions (either teams of health providers or researchers or groups defined as part of research project results generation)
- (Pseudonymized) Patient Records: pseudonym, year of birth, country of research project participants
- Practitioner Resource: search for health providers or researchers
- Audit Event Access to the audit event log
- Consents on MIDATA Access to consents of the application user with other users or applications
- Subscription Access and manage subscriptions to external systems
After this basic selection use the “Add more datatypes” button to add more data types.
Please note that each time you change the access filter all users need to reconfirm to the list on their next login
Create/Edit your access filter
Select the application you want to add/change the access filter from the list.

Create
Now you see an overview of all the settings and stuff that can be done with an application. In this view, click on Change Data Access Filter.
When you define an access filter for the first time, you will see a default selection. Now it depends which kind of user needs access to midata from you application. For example: If only patients are using the application, then select patient and click submit.
After you clicked on submit, you will se an overview of all accessible data types. After selecting the patient, it’s naturally just the previously selected patient.
Select the checkbox Logout all users and click on Save and exit. 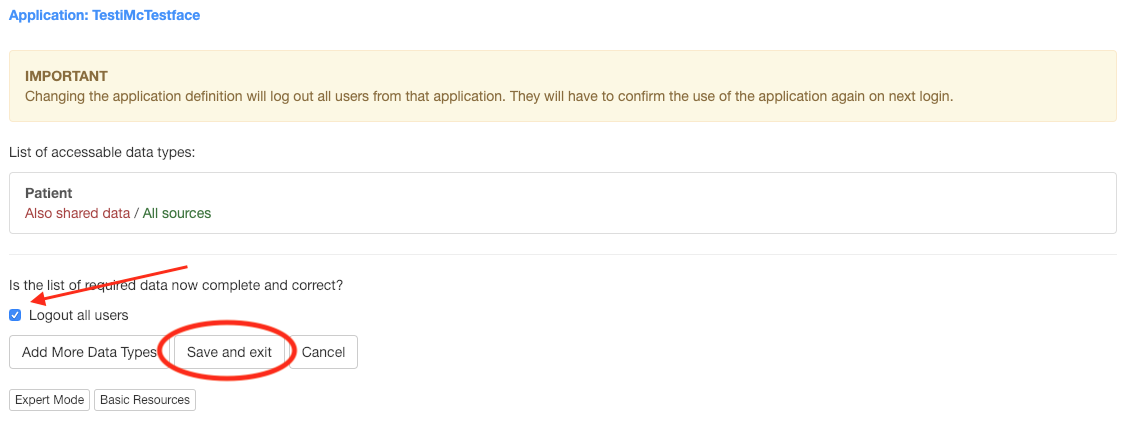
Edit
With the access filter got defined as described above, a user (patient) should now be able to log himself in, read and edit his own or other shared patient resources. In most cases this does not suffice.
To define new resources, navigate to the overview of all accessible data types, as previously explained above.
Back in the data types overview, click on the button Add More Data Types.
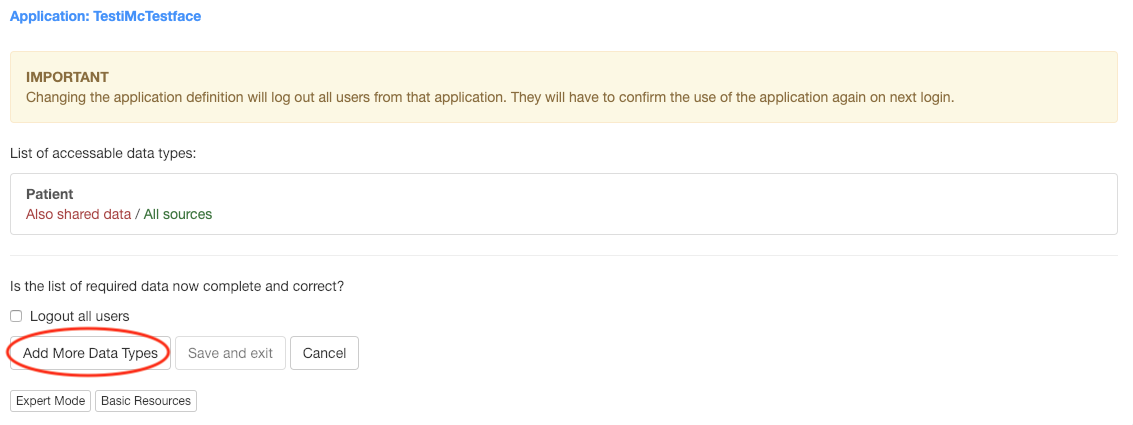
Now a search bar appears. Type in the resource you want access to. In this example we want to access body weight and blood pressure. Therefore, we type in the search field:
body
After entering the search query, click Search (not possible with enter).

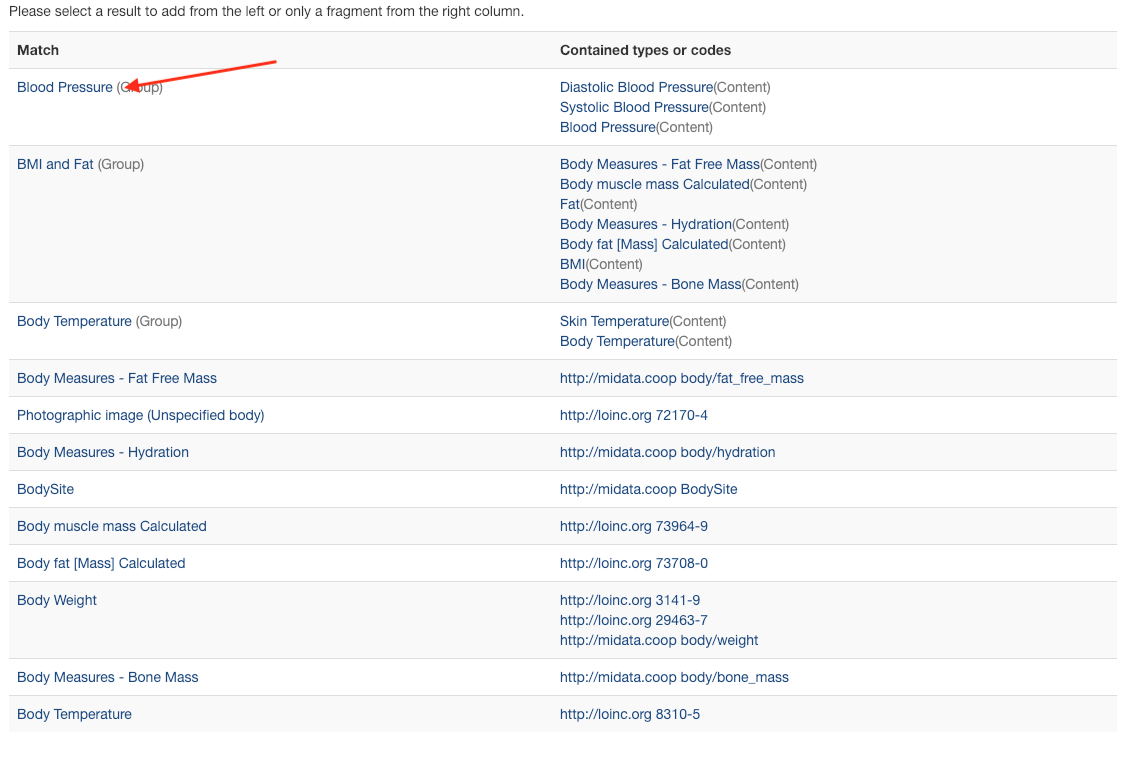
Now you will see al list of results with the given search query. Select the resource you want by clicking its name in the Match column. Now we select for example Blood Pressure (Group).
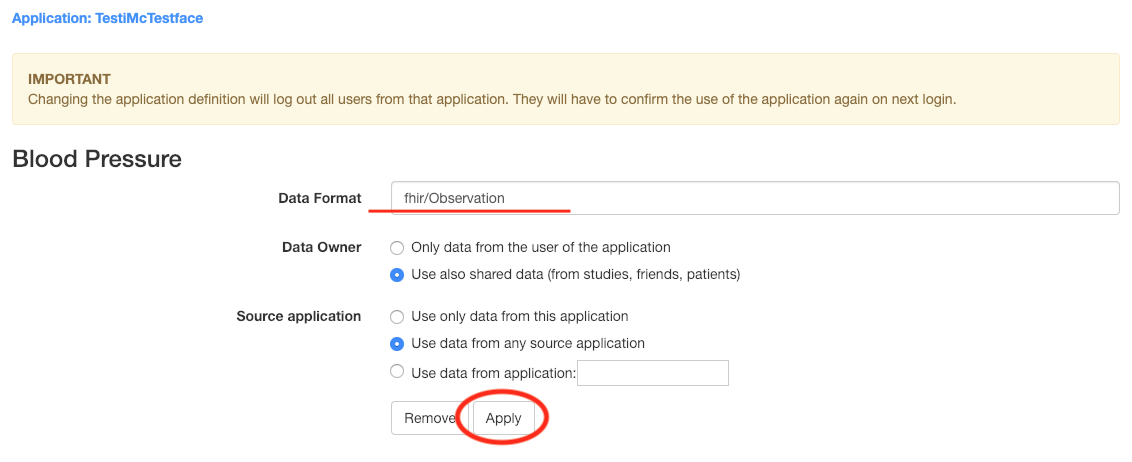
Enter the correct Data Format if not given. The Data Format is always the ‘basic’ type of the resource. For example the blood pressure is an observation. Then click on Apply.
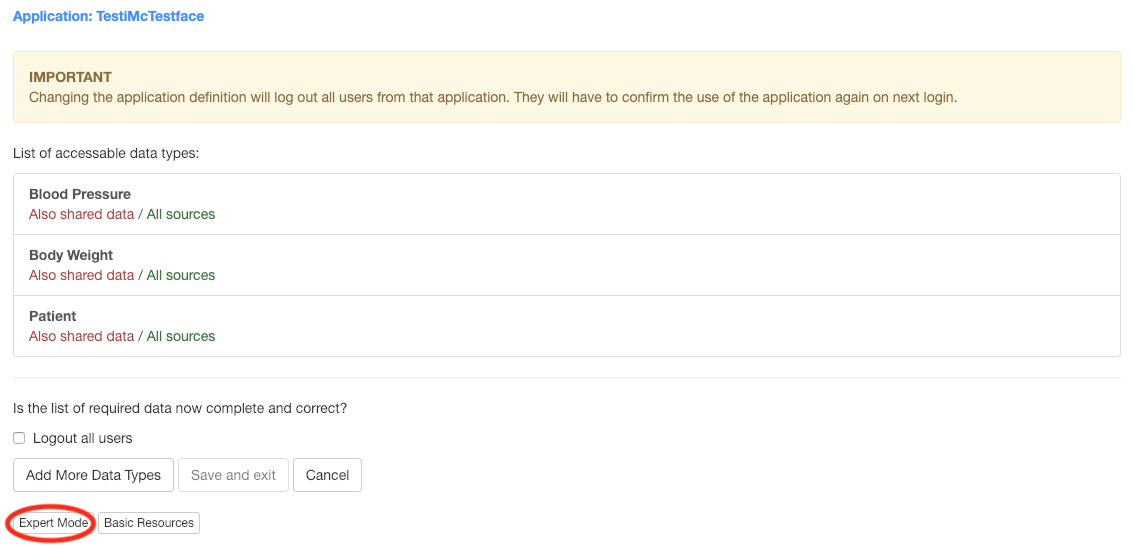
Repeat these few steps for every data type you want to use in the application. After you’ve defined all necessary resource, check Logout all users and click Save and exit.
EXPERT MODE
It is also possible, to define the access filter with the expert mode. To open the expert mode, click on the Expert Mode button in the data type overview.
Now you will see the access filter query as json. For easier editing, copy paste this json into the text editor of your choice. But how do we now define an additional Observation? For this, just add the code of the resource you want into the content array of the fhir/Observation format object.
{
    "$or": [
        {
            "group-system": "v1",
            "format": [
                "fhir/Observation"
            ],
            "group": [
                "body/bloodpressure"
            ]
        },
        {
            "format": [
                "fhir/Observation"
            ],
            "content": [
-               "body/weight"
+               "body/weight",
+               "snomed/57427004"
            ]
        },
        {
            "format": [
                "fhir/Patient"
            ],
            "content": [
                "Patient"
            ]
        }
    ]
}
If you want to define a new resource of a not already existing format type, just add the corresponding json with the "format": [] and the "content": [] definitions inside the $or array. For example, if you want to use the device resource add it like following code snipped shows:
{
    "$or": [
        {
            "group-system": "v1",
            "format": [
                "fhir/Observation"
            ],
            "group": [
                "body/bloodpressure"
            ]
        },
        {
            "format": [
                "fhir/Observation"
            ],
            "content": [
                "body/weight",
                "snomed/57427004"
            ]
        },
        {
            "format": [
                "fhir/Patient"
            ],
            "content": [
                "Patient"
            ]
-       }
+       },
+       {
+           "format": [
+               "fhir/Device"
+           ],
+           "content": [
+               "Device"
+           ]
+       }
    ]
}
After the editing in the text editor, copy paste the json back into the Data Access Filter input field and click Submit. Now you will see the newly added resource in the data types overview. Do not forget to check Logout all users and click Save and exit again!